Ace Your Job Search – SmitCast x Career Services

Can you believe who made a special appearance on SmitCast?

One of the most important departments at Pace University – The Career Services

Let me tell you, it was an absolute game-changer for anyone navigating the job market, especially for us international students.

In this dynamic podcast episode, Jane and Mahindra served up a plethora of invaluable insights and tips to help us elevate our job search game. From crafting killer resumes to mastering the art of networking at career fairs, they left no stone unturned in guiding us toward our dream career paths.

One of the standout insights from the podcast centered around the power of networking at career fairs. Jane and Mahindra underscored the significance of making meaningful connections with recruiters and industry professionals in person. They emphasized the importance of leveraging these opportunities to showcase our unique skills and experiences, positioning ourselves as valuable assets to potential employers.

If you’re ready to unlock the secrets to career success, I highly recommend tuning in to this podcast – trust me, you won’t regret it

From Mumbai Streets to NYC Beats – Kaushal’s Inspire-mazing Ride

Get ready for an inspiring tale of a Mumbai Boy with SmitCast, making waves in the Big Apple!

Currently pursuing his MS in Social Media and Mobile Marketing at Pace University, Kaushal Krishnan is not just a student; he’s a rising force in the world of digital marketing.

Amidst the iconic skyline of New York City, Kaushal also holds a Junior Sales and Marketing Manager position at The Pierre New York, A Taj Hotel

But that’s not all! Kaushal is also an aspiring entrepreneur, carving his path in the competitive fashion industry with his streetwear brand, Pineapple Express. Uncover the behind-the-scenes of his entrepreneurial journey, from ideation to the streets of NYC.

From the colorful streets of India to the concrete jungle of NYC, Kaushal shares his triumphs, setbacks, and the invaluable lessons learned along the way.

If you have an inspiring story to share, reach out to us at olc@pace.edu and be a part of my podcast.

Podcast with my co-worker

Lara and I have been working at the Online Learning Center since December 2022 and it has been an absolute pleasure. Lara has a rich background in production and film making and personally, I have learned a lot about video editing on Premiere Pro from her. Her expertise in this field has helped her bag some kickass internships with renowned companies like Fox Studios, and NBC Universal to name a few.

In the podcast, Lara shares her unique perspective and experiences as a New Yorker. She delves into the vibrancy and diversity of New York City, discussing how being a part of this dynamic environment has shaped her identity and influenced her worldview.

Lara also reflects on her time as an undergrad, highlighting the enriching experiences and opportunities she encountered during this period. She discusses academic achievements, extracurricular activities, and the valuable lessons learned along the way. These experiences contribute to her personal and professional growth.

Check out the podcast below:

Turn Your Lectures into Videos with Canva

The Online Learning Center has been working on developing a comprehensive asynchronous masters program in Health Informatics and has made significant use of Canva to create eye-catching and informative weekly videos. Watch my tutorial for a step-by-step overview of how we do it:


The following topics are covered in the tutorial:

1. Opening Canva and getting into the presentation mode

2. How to upload images and audio files on Canva

3. How to use fonts and images in Canva

4. How to add effects and transitions on the slides

5. How to download your presentation as MP4

Here’s a link to the tutorial –

I hope you like it.

AI – The Next Big Thing for OLC

Artificial Intelligence is the new buzzword these days when it comes to the completion of any and every task.

AI has the capability to automate and optimize tasks across numerous sectors, leading to increased efficiency, reduced costs, and improved productivity. As AI algorithms and systems become more sophisticated, automation will likely become more prevalent, freeing up human resources for higher-value activities.

At the Online Learning Center, we are currently exploring various AI technologies and software in order to create high-quality and engaging videos and lectures. This prompted us to employ one of the AI systems known as ‘opus.pro.’

I wanted people to be engaged in my recent trip of hosting an hour-long podcast, so I decided to cut it down into little one-minute pieces. However, it was difficult to choose which part would be the most fascinating and valuable to the viewers. To my amazement, I came across an AI tool that allows you to upload the YouTube URL for the podcast and it will automatically provide you with the top 10 one-minute snippets. Let me demonstrate:

1. Upload the link in the box:

2. Once you’ve entered your URL, the program will provide you with 10 top one-minute possibilities, each with a score. – The score reflects how significant the subject matter was throughout the narrative – The higher the score, the greater the effect – Here, I chose a score of 99 to capture the most audience attention.

3. Once you’ve chosen your clip, you may alter the subtitles and pick different colors to highlight certain strong verbs in the video.

4. You can also edit the layout of the captions, font, and color of the text.       

Here is the final outcome

SmitCast – The Story

I’ve always been a people person and an extrovert by nature; I could even talk to the most quiet person in the room.

As a Student Assistant at the Online Learning Center, I made every effort to reach out to as many students and faculty members as possible via digital media and talk to them about their experiences, Pace University, and living in New York. I subscribed to a YouTube channel called Beer Biceps, which is managed by Ranveer Allahbadia, a young man who interviews VVIPs and stars from all across India and wonderfully constructs the entire conversation for his audience. I was enthralled!

“Hey, let’s start a podcast?” I approached Brian one day while sipping my beloved Dunkin’ Donuts cappuccino. Which he said, “Let’s do this!”

I began by customizing the podcast’s structure and launched the International Student Edition series, in which I invited outstanding students to discuss their journey, concerns, challenges, and accomplishments in the city.

The goal of these podcasts is to teach and convey real-time information on how things function for each student confronting unique challenges. Furthermore, I want to set a good example for incoming international students and prepare them for life in New York.

Here’s my most recent interview with Kelly on how she got a full-time job offer one and a half years before graduating.


Do not forget to subscribe to our youtube channel and hit the bell icon to never miss an update

Using Audacity to Create a Podcast

Podcasting is becoming an increasingly popular way for people to express themselves and share their ideas with a wider audience. In order to produce a high-quality podcast, it is important to have the right tools at your disposal. One of the most important tools for podcasting is audio editing software, and Audacity is one of the most popular choices for both novice and professional podcasters.

Audacity is a free and open-source audio editing software that is available for Windows, Mac, and Linux operating systems. It is a powerful tool that can be used for recording, editing, and mixing audio files. In this blog post, we will explore the basics of podcasting using Audacity.

Recording

Before you start recording your podcast, it is important to make sure that you have the right equipment. You will need a microphone, headphones, and a quiet room to record. Once you have everything set up, you can start recording.

To start recording in Audacity, click the red “Record” button. Make sure that your microphone is properly connected and that you are speaking into it clearly. You can monitor the recording levels by looking at the “Input Level Meter” at the top of the screen. If the levels are too high, you can adjust the input volume to avoid distortion.

Once you have finished recording, click on the “Stop” button. Audacity will automatically save the recording as an audio file.

Editing

Now that you have your recording, it is time to edit it. Editing is an important step in the podcasting process because it allows you to remove any mistakes or unwanted noise from the recording.

In Audacity, you can use the selection tool to highlight the part of the recording that you want to edit. You can then cut, copy, or paste the selection as needed. You can also use the “Effect” menu to apply various effects to the recording, such as noise reduction, equalization, and compression.

Exporting

Once you have finished editing your recording, it is time to export it as a final audio file. To do this, click on the “Export” button and choose the format you want to save the file in. MP3 is the most popular format for podcasting because it is widely supported by podcast hosting platforms.

Conclusion

Audacity is a powerful and easy-to-use tool for podcasting. Whether you are just starting out or you are a seasoned podcaster, Audacity has everything you need to create high-quality podcasts. With its intuitive interface and wide range of features, Audacity is the perfect choice for anyone looking to produce professional-level podcasts.

5 Videos That Will Blow Your Mind

If you’re a fan of videos that feature stunning edits, you’re in luck!

I have scoured the web and found some of the best videos out there, featuring exceptional edits that will blow your mind.

Whether you’re into music videos, travel vlogs, or cinematic short films, I’ve got you covered.

These videos will take you on a journey through different worlds, and you’ll be left in awe of the power of video editing to transform raw footage into something truly extraordinary.

1. Best Video Editing Video:
https://www.youtube.com/watch?v=y7Ci_H9bYEk

2. Fast And Easy Visual Effects In Premiere Pro:
https://www.youtube.com/watch?v=jg9UbgvnLuo

3. Videos With Effects, Transitions, & Motion Graphics: https://www.youtube.com/watch?v=6KoqKx1TYBw

4. Informative Video:
https://www.youtube.com/watch?v=DUel5IzusKc

5. Visuals And VFX:
https://www.youtube.com/watch?v=dD_0NnC5e2U

How to edit any video like a Pro

Hello there,

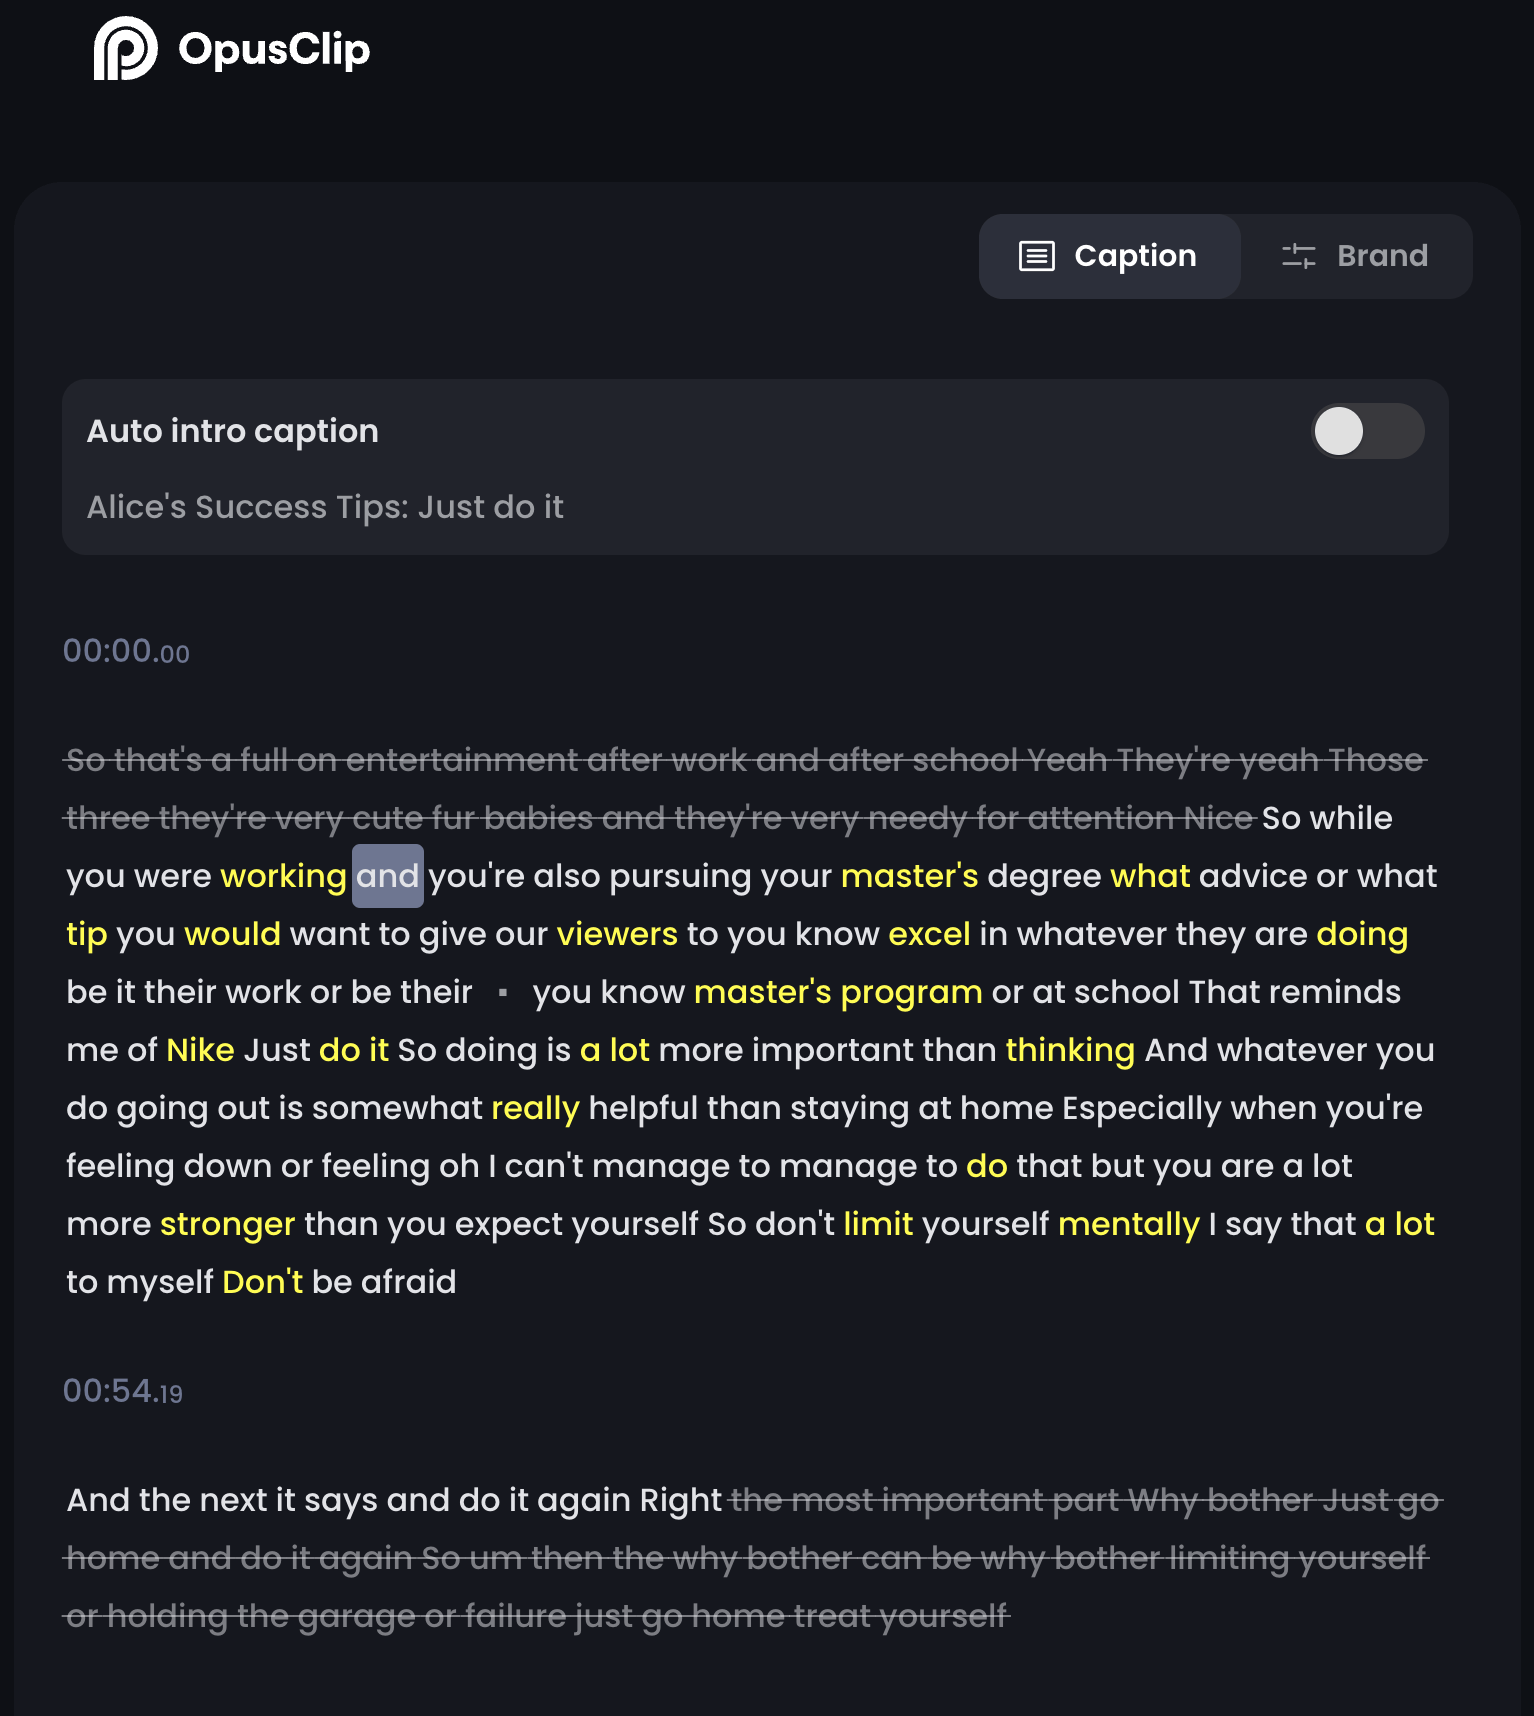
I often waste my time scrolling my project timeline while editing my videos.

Let me share some quick tips and tricks for staying organized while video editing.

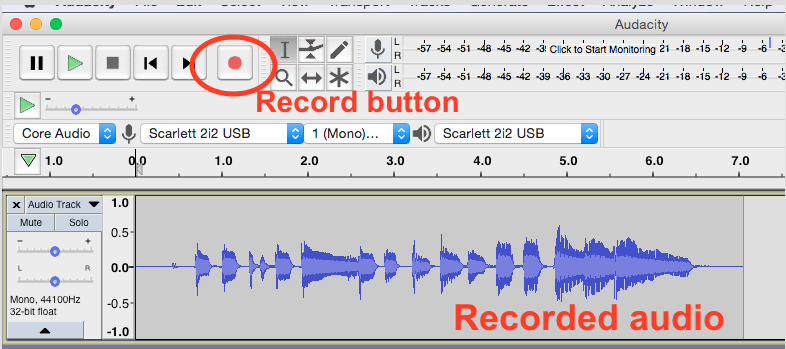
1. Choose the best software:

The first step toward enhancing your video editing process is to pick the best software for you and your work. They usually include everything you need to make standard video edits, but you may prefer one over another due to its usability, digital interface, and features. The key here is to select what works best for you and your editing style rather than the most advanced video editing program available.

2. Follow the 3-2-1 Rule:

Video editors using any program should obey the 3-2-1 rule. Keep three copies of everything you create in at least two different locations, one of which is physically separated from the others.

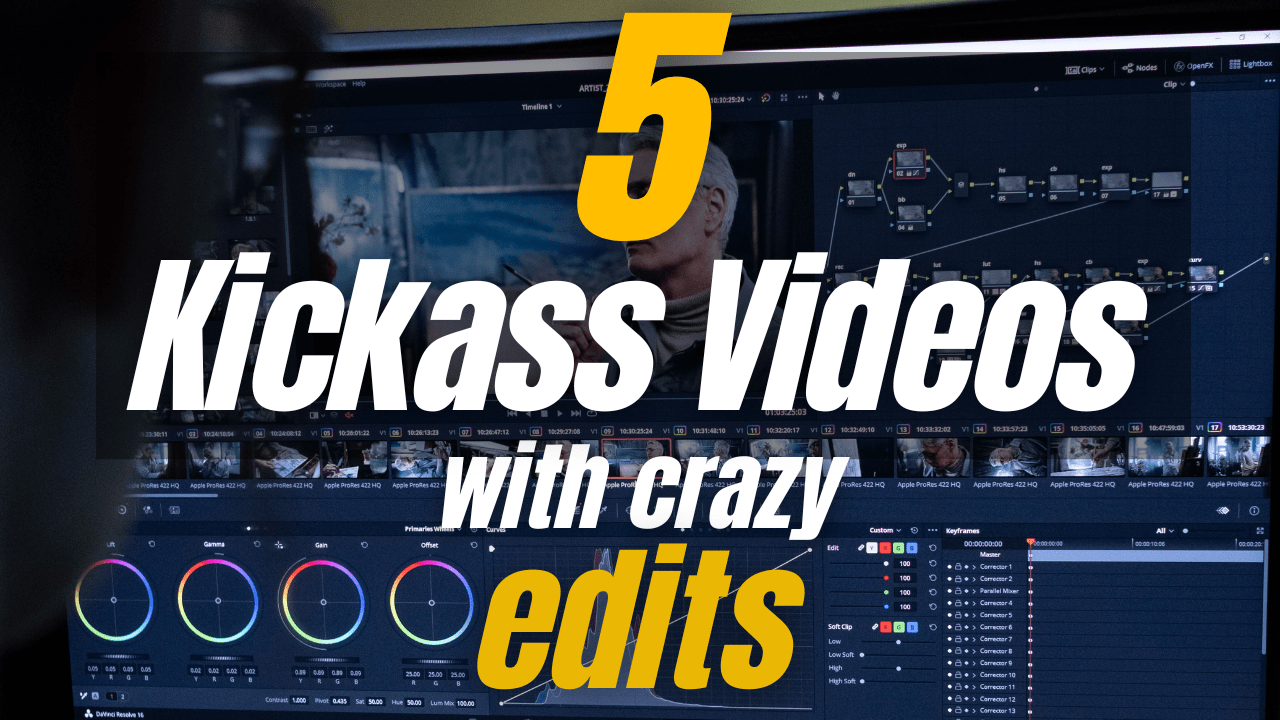
3. Edit for a story:

Go beyond the basics of removing unnecessary footage and rearranging clips to make your film aesthetically pleasing and dramatically compelling in order to generate the appropriate emotions and effectively convey your intended message. Instead of just adding a bunch of effects to impress your viewers, use your practical and technical knowledge to accomplish this.

4. Managing an efficient work flow:

Organizing your projects and files in folders that you can reuse is one way to improve your workflow. Make a home for your projects, footage, audio files, images, and graphics, and add more subsections and folders as needed.

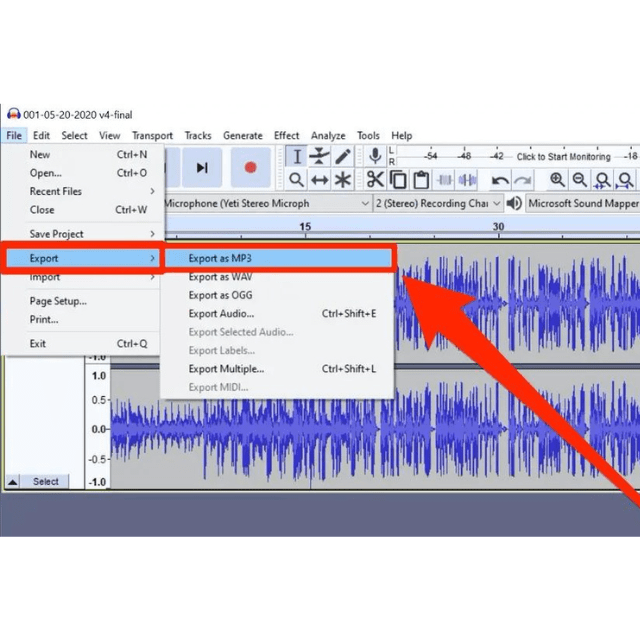
5. Use keyboard shortcuts:

Speaking of buttons, keep in mind that most editing programs allow you to perform a variety of in-app editing functions using keyboard shortcuts.

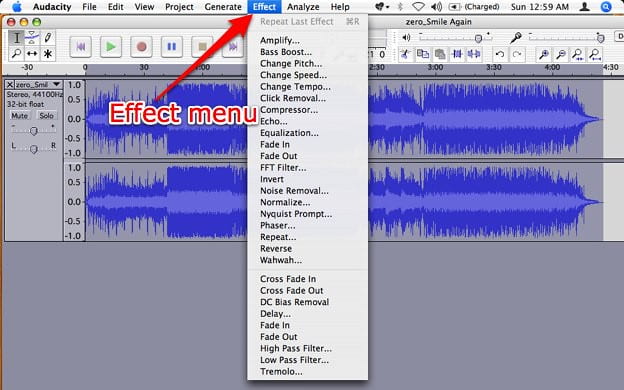
6. Color correct your clip:

Most editors do two things: color correction (to ensure that your footage’s colors are consistent in each scene) and color grading (to give your film a different look). Both are required if you want the majority of your scenes to look as realistic as possible, or if you want to distinguish certain scenes from others, such as when using presets like sepia and monochrome on “flashback” scenes.

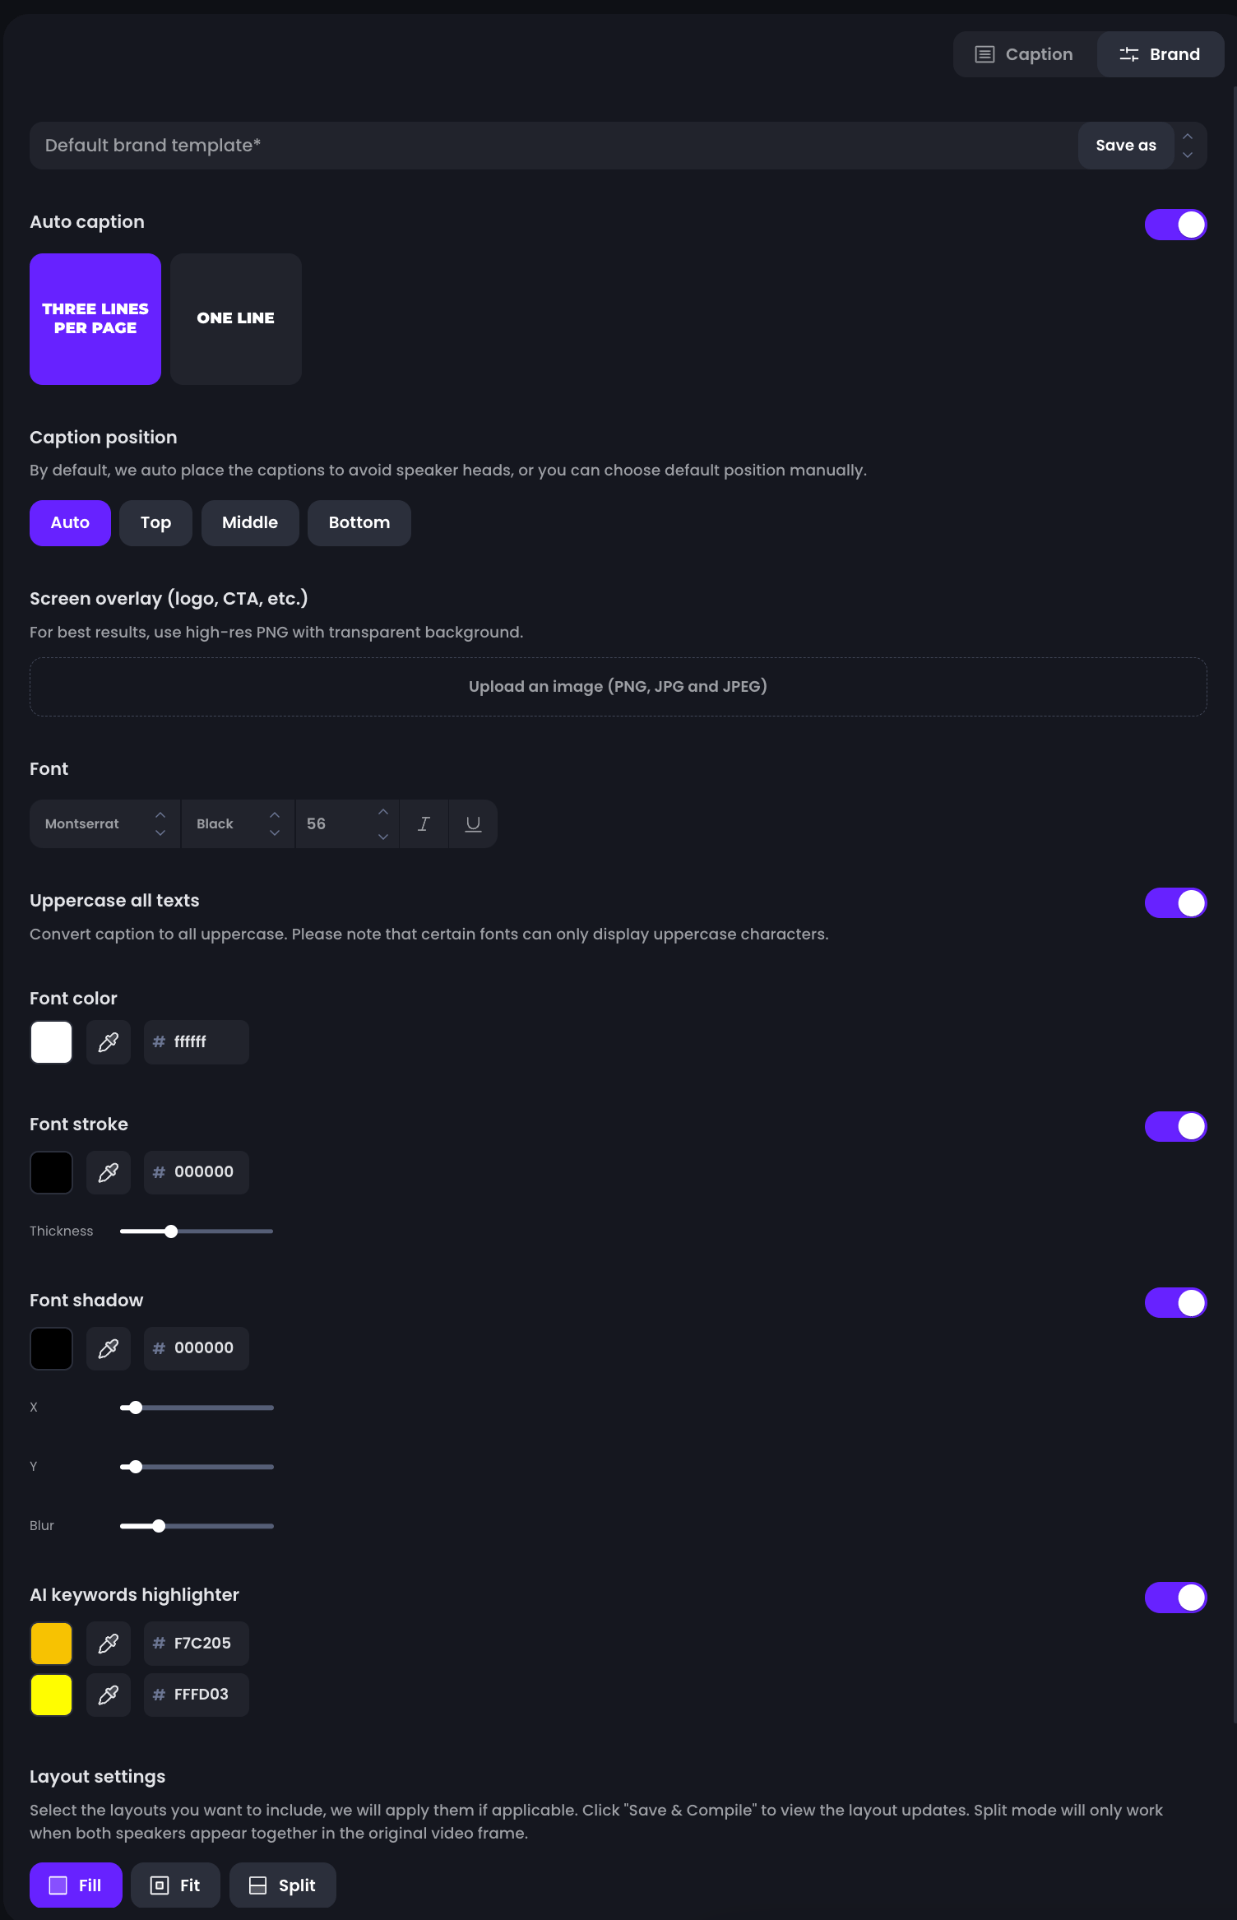
7. Add texts and graphics:

Adding text and graphics to a video can help to improve its overall appearance and draw attention to important information. Texts and graphics can help to convey a message, set the tone, or add context. They can also be used to emphasize critical things, introduce new topics, or provide useful visual aids. Text and graphics can also help to make a video more engaging and entertaining.

Skip to toolbar